Week 5 was only a four day week on account of Easter – we had some pretty horrendous weather so the builders focused on the inside, but they did get the foundations for the extension poured.

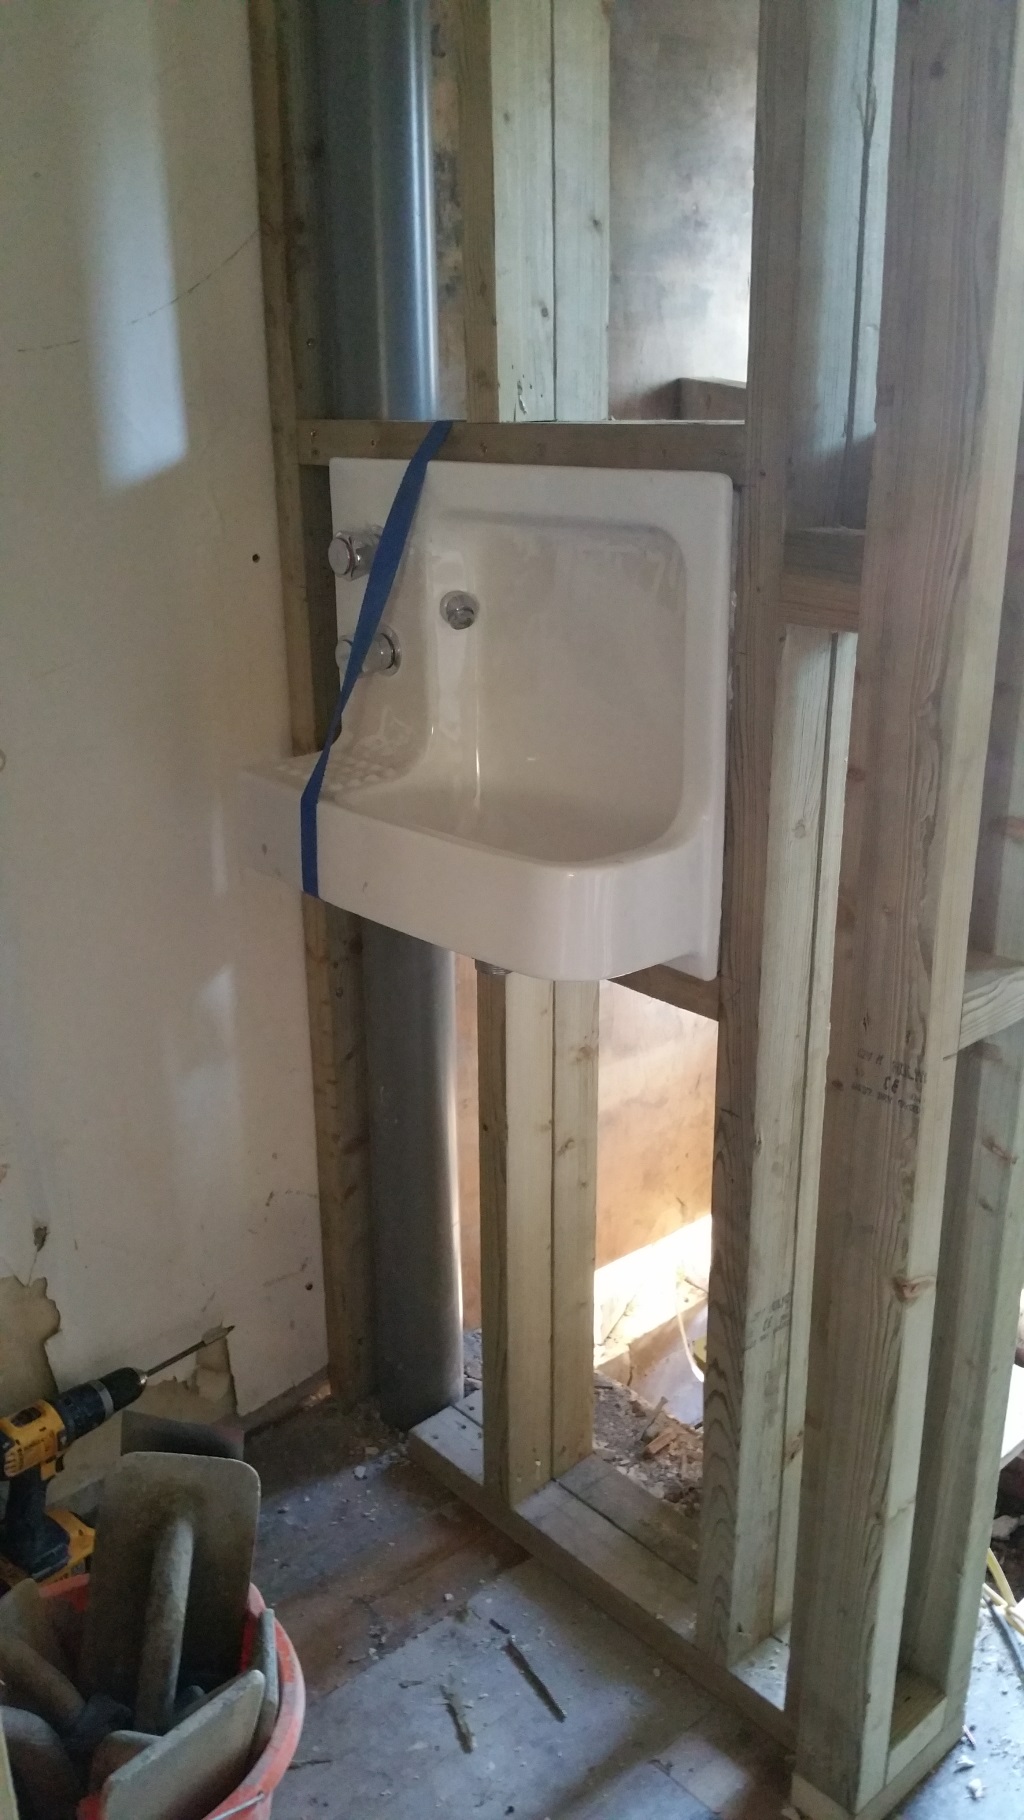
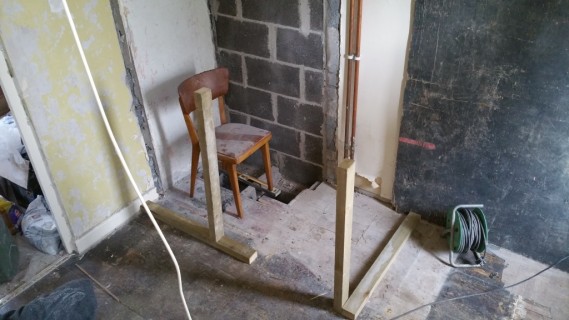
I got to lay out the timber to illustrate exactly how I wanted the downstairs loo to be set out. The original plan and the one which is on the plans is to have it set out like the diagram below. The primary reason for this particular layout being to make the soil pipe as short as possible.
As the sink was to be against where the doorway used to be, I’d assumed it would be a stud wall, and believing this I had bought a Barbican Basin. Back in December, I was casually looking for bathroom inspiration on the internet and discovered the sink which was designed for the Barbican centre – apparently the Barbican plans had been drawn up before the regulation to have a washhand basin in every WC was introduced, so they had to come up with a compact solution and designed this basin that is mainly set into the wall and only protrudes 15cms. It’s also amazingly retro and I loved it. Twyfords still manufacture it but, as you have to no choice but to buy the brassware which specifically goes with the basin, it costs about £500. Yeah…. exactly, but then, as always, one popped up on eBay. It was in London and although I emailed the guy and asked if he would post it to me, he said it was for collection from Islington only. Now my friend Hannah works in Islington, she happened to be on a trip home and I was going for tea with her that evening, so I hatched a plan and she was up for it. I won the auction and after a bit of phaff sorting a courier the basin arrived in one piece. Then Dave (the builder) happens to say something along the lines of “when that doorway is bricked up…”, “errr, WHAT?” – turns out that was another point I’d failed to appreciate on building regs plans.
Fortunately, the whole distance of the soil pipe thing is apparently neither here nor there so I suggested we turn the WC round and install the sink into the stud wall. Phewf!
This week I got to lay it out in timbers with the aid of a chair my Dad was given in 1984 from a Chinese restaurant which was downsizing. The building regs plans also have the drain from the shower coming down inside the WC but the builders are going to make that end stud wall slightly thicker to conceal it.
In preparation the new soil pipe has been put in under the floor.

The waste pipes under the manhole cover were apparently not deep enough so a new chamber had to be installed. Unfortunately that meant quite a bit of digging and breaking up of the concrete which had been put around the pipe.

There’s the new chamber. Once the building inspector has seen it and said he’s happy, the soil can be filled around it so it’s flush with the surface. You can also see my new earth rods (they went in last summer) in this photo.

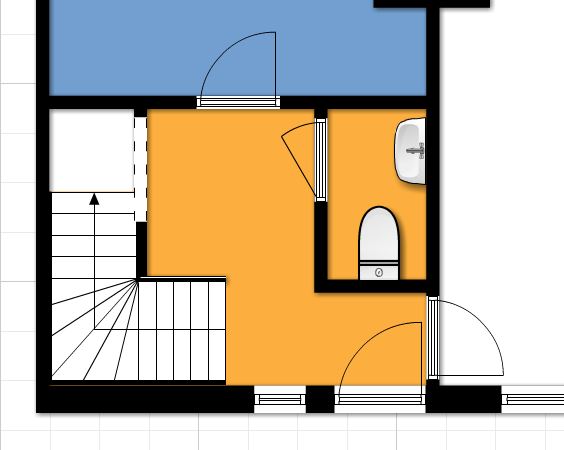
Moving upstairs, I also got to decide exactly what size I wanted the shower to be. I had had a massive dilemma about this previously and finally concluded that my only option was to go for a 760mm x 760mm square shower so that’s what was drawn on the plans.

Ages afterwards I was flicking through a bathroom brochure and spotted that you could get 700mm wide showers. Why did no-one tell me this? I asked in three bathroom showrooms and on an web forum for a solution! The reason I thought I couldn’t go any longer on the shower than 760 was because the 10cm protrusion would get too close to the knee of anyone sitting on the loo, but if the shower only stuck out 4cm, it would be fine so it could be much wider, like 1000mm. So when the builders put in the lintel above this wall they made it big enough to handle an enormous shower but I was also told that the work to keep the bits of wall left over from the airing cupboard and make it all good, would be roughly the same as the work to take it all out and build new stud walls. So I could have any size shower I wanted, it was just up to me how much of the bedroom I wanted to pilfer. The field was now open to any combination of 700, 760, or 800 deep by 760, 800, 900 or 1000 wide. Arrrghh – more decisions!
I figured, if it was no difference to build a new wall, I might as well avoid having the shower jutting out into bathroom – so it should move at least 4cm back (700 deep), but should I go deeper? I was less worried about moving the wall back a few centimetres than I was about the swing of the door – if we moved the wall I’d assumed we would also move the door frame. I was pondering this at lunchtime when the sound of my opening and closing my tape measure drew my colleague Gordon’s attention – once I explained the problem he suggested I ask if the doorway could stay where it was. Dave, the builder, said it could so then my decision was should I just go for 760 (10cm into the room) or should I go out to 800 (14cm into the room). I’d already decided the width should be 900mm; 1000 was ludicrously wide, 900 was wide enough and gave me a better choice of shower doors, I didn’t really gain anything in the bedroom by going smaller than 900. But the depth had me stumped. Would the cupboard be too deep? Is 800 x 900 just greedy? This was definitely one of those moments when I realised quite how ridiculous I can be – stood there holding the tape measure, with Dave silently watching on, while I deliberated over four whole centimetres. Eventually, I asked if there would be enough space for a light switch on the jutting out bit of wall, the answer was “800 would be better for a light switch”. Hurrah – decision made! 800 by 900!
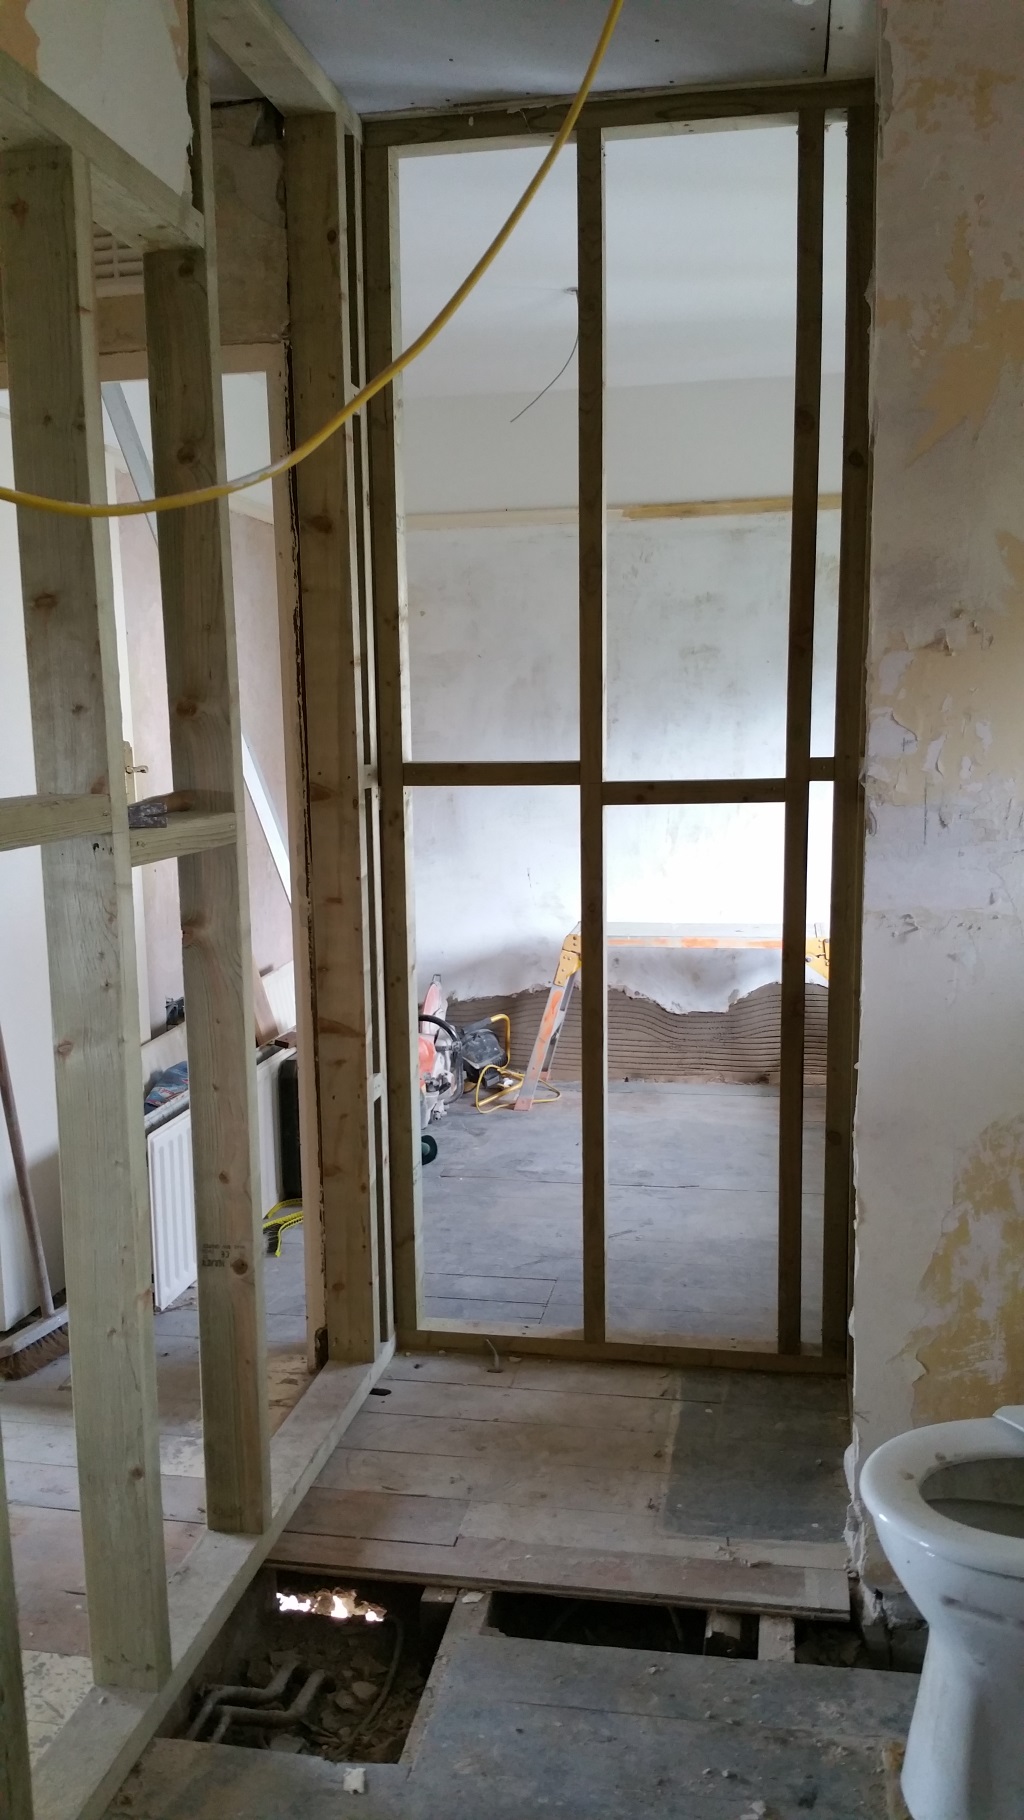
 So here it is – it feels enormous! Hopefully that’s just because there are no walls yet!


The stud wall on the corridor side uses wider timber – this is so I can have a niche in the shower for shampoo etc – it’ll be in the corridor wall so the lack of sound insulation will be less of a problem. The only problem with this is that the position of the niche depends on the size of the tiles – so the pressure is now on for me to pick my tiles!
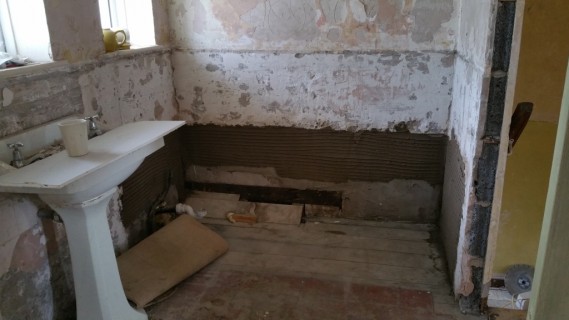
The bathroom suite is being replaced, it wasn’t my original plan but the bath had a hole in it which looked suspiciously like a cigarette burn and the basin (although I actually really like the basin – it’s a classic Twyford style) has a cracked pedestal. The bath is a old sized 5′ 6″ length (1675mm) and the wall had been channelled out fit it in.
 It looks like the builders had to have a good chew to get it out.

The actual space between the walls is 1650mm. Modern baths are mostly 1700mm. Compact ones are 1600mm. You can get some imperial replacements at 1670mm but Dave recommend I get a bath which actually fitted rather than attempt to channel the wall again. There are very few 1650mm baths and I would prefer a double ended one (I just think they look better with the taps in the middle). Carron make a 1650mm but it’s single ended, Bette make a double ended 1650mm bath but it’s steel – with a steel bath you normally have your taps mounted in the wall, it is possible to have the manufacturer drill your holes but it means the lead times are quite long – plus it’s not cheap, around £600 for the bath with holes. Meh!
After explaining all this fiasco to Dave he pointed out that the walls are a mess and maybe we should board them out and make a 1600 bath fit!
As I was arriving on Thursday morning I saw a crow look like it was coming in to roost – the small holes left by the needles probably looking like the perfect nesting box. I ran upstairs but there was no crow there – apparently one had got in the day before though! Now the builders have bricked up the inside wall and put a scratch of plaster on coat on, so it can’t happen again. They’ve also patched my floorboards here and everywhere they’ve looked a bit rough – there are some ‘spongy’ patches just inside the front door which will have to be done too.
 Man, that was a long post!